因為個人先前的 Server 等級為P4、2.4GHz、RAM 786MB 運行上已不足應付流量,因此打算它升級,考慮了許久終於在今年(98)年初決定下手了,目前本系統為 Vista、Core2 Quad Q9400 2.66GHz、RAM 4G 給它Run Run 看嘍!!
因為系統升級了且資料都須搬移至新電腦裡,在各軟體相容變數皆不定的前題下,使得在安裝過程中花費了我不少時間修正與查詢,
總算已可上路了,基本設定都沒問題,但總會出現未知的BUG,所幸都一一克服了,以下為本系統安裝過程提供參考。
首先在安裝過程中會因為各程式需要相互關聯與找尋,因此,自己必須先將整個 Sverver 架構雛型確定,並設定環境以預防問題出現,以下為範例:
先建立資料夾
Server 架構(主機)
X:\ServerPath\Apache
X:\ServerPath\PHP
X:\ServerPath\MySQL
Web 架構(網頁)
X:\WebPath\index.html
X:\WebPath\phpMyAdmin
設定程式路徑,將 Apache、PHP、MySQL、phpMyAdmin等程式相關路徑設定好,先找出環境變數路徑:
電腦(右鍵) / 內容 / 進階系統設定 / 環境變數 / 系統變數 / PATH / 編輯 將下列語法加到最後。
X:\ServerPath\Apache\bin;F:\ServerPath\PHP\ext;X:\ServerPath\Mysql;X:\Myweb\phpMyAdmin
開始安裝 Apache 官方網址:
http://httpd.apache.org/ 下載最新版
以下以 apache_2.2.11-win32-x86-no_ssl.msi 為例
請參閱 Apache 安裝圖示 (
http://lchblogger.blogspot.tw/2012/09/apache-server.html)
找到以下值
#ServerName localhost:80
修改如后(這是要連結網頁的IP)
ServerName
http://123.123.123.123:80
找到以下值
#DocumentRoot "F:/ServerPath/Apache/htdocs"
修改如后(這是要連入Server網頁的path)
DocumentRoot "X:/WebPath"
找到以下值
#< Directory "X:/ServerPath/Apache/htdocs" >
修改如后(這是要連入Server網頁的path)
< Directory "X:/WebPath" >
找到以下值(增加index.htm index.php...這是網頁中連入後所要找的第一個程式)
< IfModule dir_module >
DirectoryIndex index.html index.htm index.php
< /IfModule >
找到以下值(增加下列三語法,這是連入網頁後第一個程式的支援運用程式)
< IfModule mime_module >
AddType application/x-httpd-php .php
AddType application/x-httpd-php .htm
AddType application/x-httpd-php .html
< /IfModule >
根據你的 php 安裝目錄,在下面空白處加上這兩行:(這是告訴Apache您裝的php函式庫path)
LoadModule php5_module "H:/Web/SERVER/PHP/php5apache2_2.dll"
PHPIniDir "H:/WebW/SERVER/PHP"
繼續安裝PHP,官方網址:
http://www.php.net/ 取得最新版本
以下以 php-5.2.8-win32-installer.msi 為例
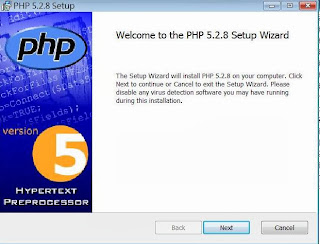
請參閱 PHP 安裝圖示 (
http://lchblogger.blogspot.tw/2012/09/php.html)
安裝至F:\ServerPath\PHP路徑
在PHP目徑下找到 php.ini.disc 將其更名為 php.ini
找下列值修改
;default_charset = "iso-8859-1"
改變字編碼為以下
default_charset = "none"
找下列值修改
; Windows: "\path1;\path2"
;include_path = ".;c:\php\includes"
修改如下(注意分號要拿掉)
include_path = ".;F:\ServerPath\php"
找下列值修改
;原值doc_root =
修改如下(這是網頁的路徑)
doc_root = "F:\WebPath"
找下列值
;extension_dir = "./"
修改如下(注意分號要拿掉),這是php延伸函式庫路徑
extension_dir = "X:\ServerPath\PHP\ext"
找下列值將分號去掉
extension=php_mbstring.dll
extension=php_mcrypt.dll
extension=php_mysql.dll
extension=php_mysqli.dll
upload_tmp_dir
upload_max_filesize
到此應該都沒有問題,如需上傳與下載資料則需額外設定其他設定值,如
max_execution_time
max_input_time
memory_limit
post_max_size
以上設定會關係上(下)載檔案的成敗(詳先前心得資料)
用文字編輯器編輯以下語法並命名為 index.php
< ?php
phpinfo()
?>
將它存為 X:\WebPath\index.php ,進入瀏覽器測試一下吧
安裝 MySQL 官方網址:
http://www.mysql.com/
下載 mysql-5.0.67-win32.zip 並安裝
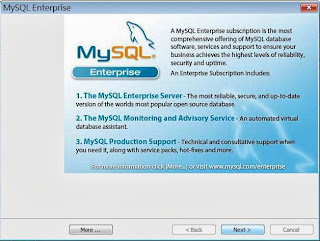
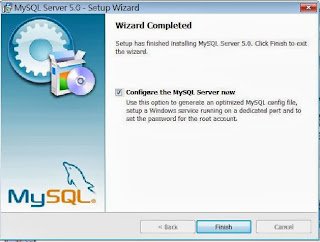
請參閱 MySQL 安裝圖示 (
http://lchblogger.blogspot.tw/2012/09/mydql.html)
安裝 phpMyAdmin 官方網址:
http://www.phpmyadmin.net/home_page/index.php
下載 phpMyAdmin-3.1.2-rc1-all-languages.7z
解壓縮至F:\WebPath\phpMyAdmin
然後將 libraries 子文件夾中的 config.default.php 複製到 phpmyadmin 根目錄下,並重命名為 config.inc.php
找下列值
$cfg['PmaAbsoluteUri'] = '';
修改如下(設定 phpMyAdmin 的路徑
$cfg['PmaAbsoluteUri'] = 'http://localhost/phpMyAdmin';
找下列值
$cfg['Servers'][$i]['auth_type'] = 'cookies';
修改如下(這是以遠端登入方式進入MySQL)
$cfg['Servers'][$i]['auth_type'] = 'http';
打開 Apache 的配置檔 httpd.conf,找到 # Alias /webpath /full/filesystem/path,在下面添加一下代碼(具體路徑根據自己的情況修改):
Alias /phpMyAdmin "X:/WebPath/phpMyAdmin"
< Directory "X:/WebPath/phpMyAdmin" >
AllowOverride None
Options None
Order allow,deny
Allow from all
< /Directory >
以上全套 Server 安裝已完成,Good Luck !!


